
- PRODUCTSFREEWAREFOR COMMERCIAL USEFOR PERSONAL AND BUSINESS USEBackup and System Restore:PC Privacy and Security:
- BUY ONLINE
- DISTRIBUTION


-
Installation, Activation and Uninstallation instructions for R-Studio T80+ licenses


- R-Studio T80+ licenses for Windows, Mac, and Linux are sold separately and are not interchangeable. A purchased license can only be used on a computer running the same operating system (OS) for which the license was acquired. However, you can use the same registration key to activate the R-Studio Technician Emergency version, which allows you to run the software on a serviced computer, regardless of the installed OS. Note that the following instructions specifically apply to the R-Studio T80+ license for Windows and do not pertain to R-Studio Technician or R-Studio Standalone.
- The R-Studio T80+ license requires activation every time the software is launched, and a new data recovery session begins. This activation needs an Internet connection, which can be established either directly on the computer where the software is installed or indirectly using a QR code and a smartphone. There are no exceptions to this requirement; alternative activation via USB sticks is offered for the R-Studio Technician license only.
- If you have purchased the incorrect license or have any concerns about the software's functionality or licensing terms, it is essential that you contact us before activating the license on the first serviced computer.
- You can download the R-Studio Technician/T80+ setup files compatible with the purchased license from our "My Order" portal.
Installation: 1. Run the downloaded RStudioTech9.exe file.
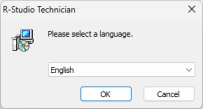
2. Select the language of the install process:
Click image to enlarge
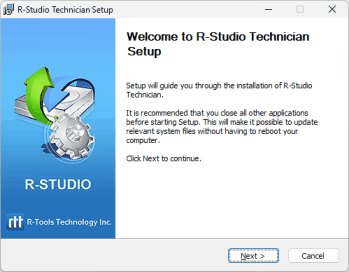
3. Run the Setup wizard.
Click image to enlarge
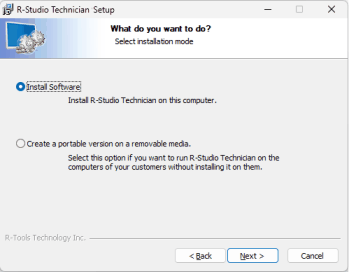
4. Select the installation mode - Install R-Studio Technician on this computer.
Click image to enlarge
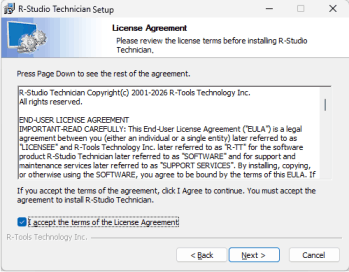
5. Read the License Agreement and accept its conditions.
Click image to enlarge
6. Read the warning that you must not install the program on the disk where the lost files resided.
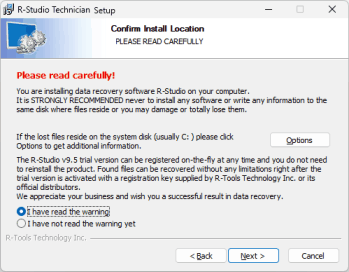
Click image to enlarge
Click the Options button if your lost files reside on the system disk.
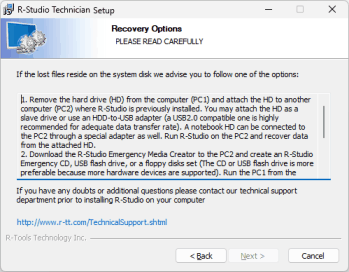
Click image to enlarge
7. If necessary, change the destination folder for the program.
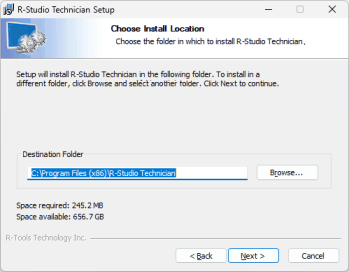
Click image to enlarge
8. If necessary, change the program group.
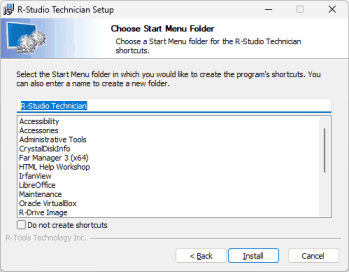
Click image to enlarge
9. Wait while the program is being installed.
You may start the program as soon as the installation finishes.
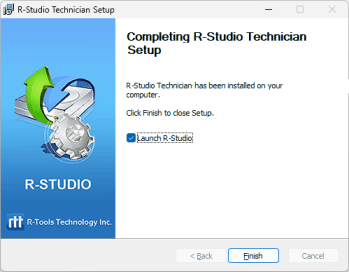
Click image to enlarge
Registration/Activation:
- The R-Studio T80+ license requires activation every time the software is launched, and a new data recovery session begins. This activation needs an Internet connection, which can be established either directly on the computer where the software is installed or indirectly using a QR code and a smartphone. There are no exceptions to this requirement; alternative activation via USB sticks is offered for the R-Studio Technician license only.
- With an R-Studio T80+ license, you are allowed to service an unlimited number of computers. However, before transferring the license to a different computer, you must complete an open data recovery session on the original computer. If you do not finish this session, you will be unable to activate the license on a new computer.
- Please note that R-Studio software does not transmit your data to R-TT, except for the information outlined in our R-TT privacy policy.
- R-Studio T80+ appears as R-Studio Technician in the system.
When you start R-Studio T80+ for the first time the Please Register R-Studio Technician Demo dialog box will appear. Enter your registration key for R-Studio T80+ and register your copy of R-Studio
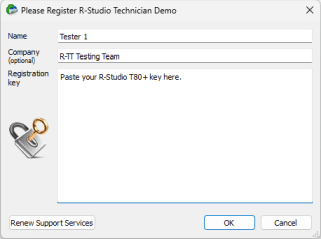
Click image to enlarge
Or click Cancel to run R-Studio Technician in its Demo mode.
Accept the License Agreement and click OK
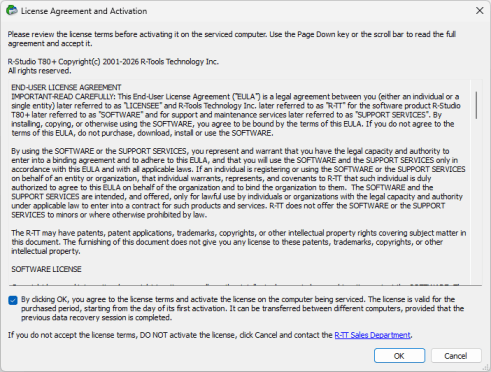
Click image to enlarge
If the computer you wish to license is connected to the internet, it will be activated automatically, and a "Registration and activation successful" window will appear.
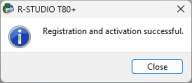
Click image to enlarge
And R-Studio T80+ will work in its full capacity.
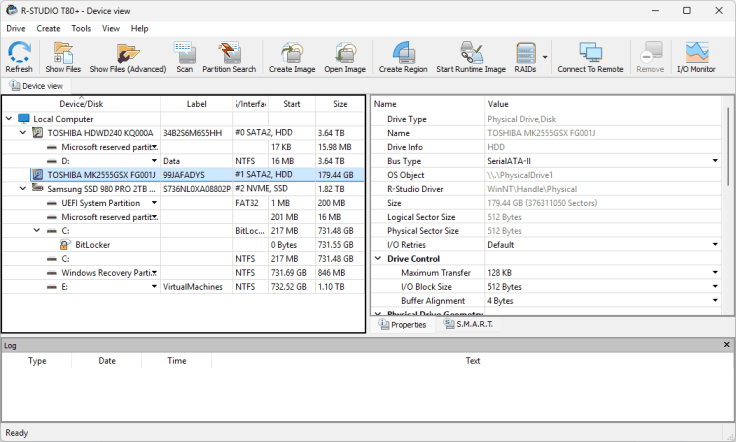
Click image to enlarge
When launching R-Studio, if an internet connection is unavailable, the "Online Activation" dialog box will appear.
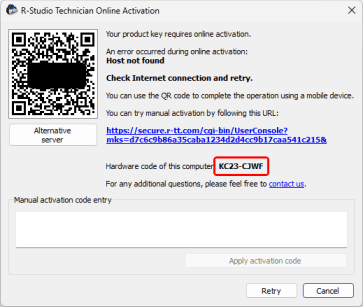
Click image to enlarge
You can copy the URL with the activation information and open it on another computer with an internet connection, then receive the activation code and enter it in the appropriate field in the dialog box.
You can also activate R-Studio using your smartphone. Scan the QR code and go to the provided URL to receive an activation code and complete the activation process.
You can verify whether the activation was successful and see which license is tied to the hardware code of the licensed computer in the software's "About" window (Help>About).
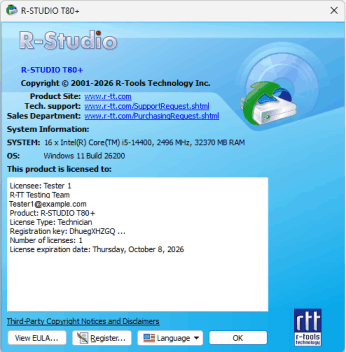
Click image to enlarge
If the software is running in Demo mode or needs re-registration, access the registration window through the Help > Register menu.
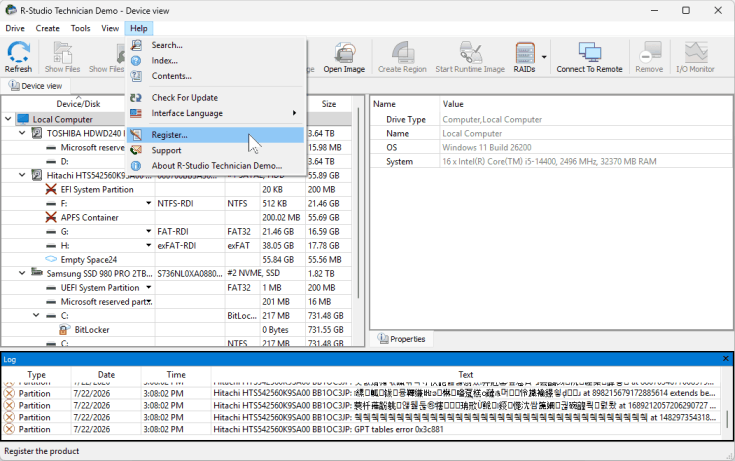
Click image to enlarge
Note that if you need to register R-Studio T80+ on another computer, which you are allowed to do, you need to close all data recovery sessions on the old one.
The R-Studio Emergency license is included with the R-Studio Technician license. To learn how to create an R-Studio Emergency Startup Device and activate it, please review our article "Emergency File Recovery".
The R-Studio Agent and R-Studio Agent Emergency licenses are part of the R-Studio T80+ license. Detailed instructions for their use and activation can be found on our pages "Data Recovery over Network" and "Emergency Data Recovery over Network".
Uninstall: The software can be uninstalled from a Windows 10/11 computer by following these steps: go to Start > Settings > Apps > Installed Apps > R-Studio, then click the three-dot menu and select Uninstall.
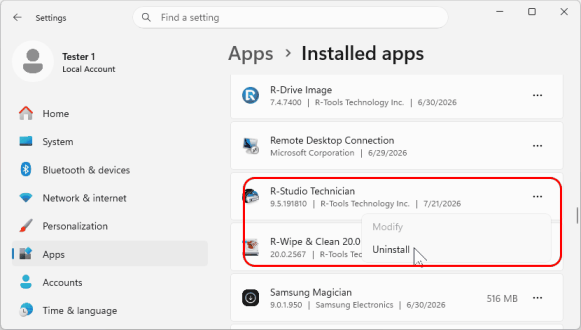
Click image to enlarge
Then follow the Uninstallation Wizard to complete the program removal.
- R-Studio Technician: activation using a USB stick
- Data Recovery Guide
- Why R-Studio?
- R-Studio for Forensic and Data Recovery Business
- R-STUDIO Review on TopTenReviews
- File Recovery Specifics for SSD devices
- How to recover data from NVMe devices
- Predicting Success of Common Data Recovery Cases
- Recovery of Overwritten Data
- Emergency File Recovery Using R-Studio Emergency
- RAID Recovery Presentation
- R-Studio: Data recovery from a non-functional computer
- File Recovery from a Computer that Won't Boot
- Clone Disks Before File Recovery
- HD Video Recovery from SD cards
- File Recovery from an Unbootable Mac Computer
- The best way to recover files from a Mac system disk
- Data Recovery from an Encrypted Linux Disk after a System Crash
- Data Recovery from Apple Disk Images (.DMG files)
- File Recovery after Re-installing Windows
- R-Studio: Data Recovery over Network
- How To Use R-Studio Corporate Package
- Data Recovery from a Re-Formatted NTFS Disk
- Data Recovery from an ReFS disk
- Data Recovery from a Re-Formatted exFAT/FAT Disk
- Data Recovery from an Erased HFS Disk
- Data Recovery from an Erased APFS Disk
- Data Recovery from a Re-Formatted Ext2/3/4FS Disk
- Data Recovery from an XFS Disk
- Data Recovery from a Simple NAS
- How to connect virtual RAID and LVM/LDM volumes to the operating system
- Specifics of File Recovery After a Quick Format
- Data Recovery After Partition Manager Crash
- File Recovery vs. File Repair
- Data Recovery from Virtual Machines
- How to Recover Files from a Remote Computer Using R-Studio Standalone License and Its Network Capabilities in Demo Mode
- How to Connect Disks to a Computer
- Emergency Data Recovery over Network
- Data Recovery over the Internet
- Creating a Custom Known File Type for R-Studio
- Finding RAID parameters
- Recovering Partitions on a Damaged Disk
- NAT and Firewall Traversal for Remote Data Recovery
- Data Recovery from an External Disk with a Damaged File System
- File Recovery Basics
- Default Parameters of Software Stripe Sets (RAID 0) in Mac OS X
- Data Recovery from Virtual Hard Disk (VHD/VHDX) Files
- Data Recovery from Various File Container Formats and Encrypted Disks
- Automatic RAID Parameter Detection
- IntelligentScan Data Recovery Technology
- Multi-pass imaging in R-Studio
- Runtime Imaging in R-Studio
- Linear Imaging vs Runtime Imaging vs Multi-Pass Imaging
- USB Stabilizer Tech for unstable USB devices
- Joint work of R-Studio and PC-3000 UDMA hardware
- Joint work of R-Studio and HDDSuperClone
- R-Studio T80+ - A Professional Data Recovery and Forensic Solution for Small Business and Individuals Just for 1 USD/day
- Backup Articles
- R-Drive Image Standalone and Corporate license transferring
- Fixing Windows update error 0x80070643 with R-Drive Image
- Backup with Confidence
- R-Drive Image as a free powerful partition manager
- Computer Recovery and System Restore
- Disk Cloning and Mass System Deployment
- Accessing Individual Files or Folders on a Backed Up Disk Image
- R-Drive Image startup / bootable version
- File Backup for Personal Computers and Laptops of Home and Self-Employed Users
- Creating a Data Consistent, Space Efficient Data Backup Plan for a Small Business Server
- How to Move the Already Installed Windows from an Old HDD to a New SSD Device and Create a Hybrid Data Storage System
- How to Move an Installed Windows to a Larger Disk
- How to Move a BitLocker-Encrypted System Disk to a New Storage Device
- How to backup and restore disks on Linux and Mac computers using R-Drive Image
- R-Drive Image and Virtual Machines
- Undelete Articles
- Get Deleted Files Back
- Free Recovery from SD and Memory cards
- R-Undelete: Video Recovery
- Recovery from an External Device with a Damaged File System
- File recovery from a non-functional computer
- Free File Recovery from an Android Phone Memory Card
- Free Photo and Video File Recovery Tutorial
- Easy file recovery in three steps