-
Data Recovery from Virtual Machines
As hardware virtualization and software emulation technologies become more powerful and affordable, virtual machines (VMs) have become a much more viable solution for business and power users. While virtual machines have a number of advantages over physical machines, VMs share a few key vulnerabilities with physical hosts. This includes the potential for file system corruption and data loss.
Fortunately, the same powerful data recovery tools that work for physical machines can also be used to recover data from virtual machines. In this article, we'll look at several virtual machine data recovery methods using R-Studio. This tutorial shows the steps performed in VirtualBox, but any virtualization software will also work.
But before we begin, we need to clarify some license issues:
- If you want to install R-Studio on several virtual machines, you need to obtain a license for every R-Studio installation. In this case, every virtual machine is treated the same way as a physical one. You can run all R-Studios simultaneously to use them according to their license terms stated in their EULAs.
- If you want to serve all your instances of virtual machines running on a single server, you need to install one copy of R-Studio on the server and thus obtain one license. In this case, you'll need to stop a certain virtual machine instance and use the methods below to recover data from that virtual machine.
Method 1: Data Recovery from Virtual Machines with Virtual Disks that are Supported by R-Studio (all licenses)
Starting from version 9.3.191223 (Windows), 7.3.191246 (Mac), and 5.3.191246 (Linux), R-Studio supports almost all disk image formats native for most popular virtual machines (Microsoft's Hyper-V: VHD/VHDX, VMWare's Workstation/Player: VMDK, Oracle's VirtualBox: VDI, etc). R-Studio may load them as images
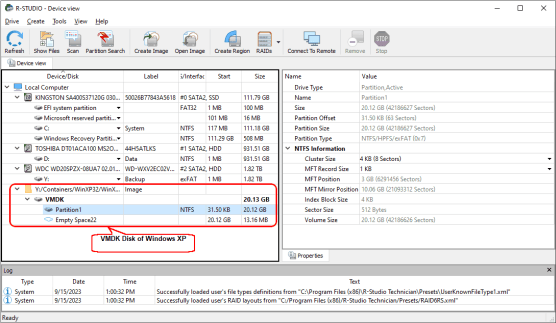
Click image to enlarge
and process them like real physical disks.
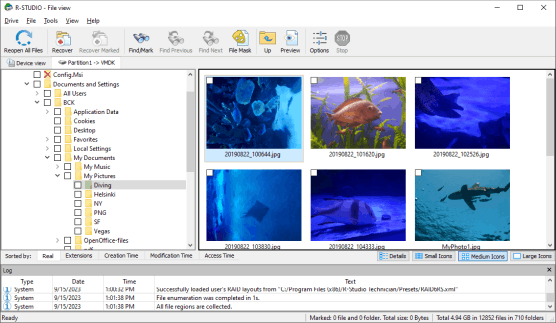
Click image to enlarge
Additionally, you may read more on the processing of VHD/VHDX disks in our article Data Recovery from Virtual Hard Disk (VHD/VHDX) Files.
R-Studio Corporate and Technician/T80+ can also create such images (VHD/VHDX, VMDK, and VDI).
Method 2: Data Recovery from Virtual Machines with virtual disks that are not supported by R-Studio (all licenses)
A virtual disk file with such severe damage that neither its native software nor R-Studio can open it.
R-Studio can load them as byte-by-byte images.
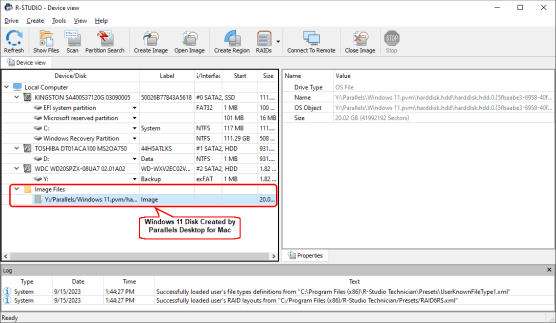
Click image to enlarge
and process them accordingly. R-Studio can scan them.
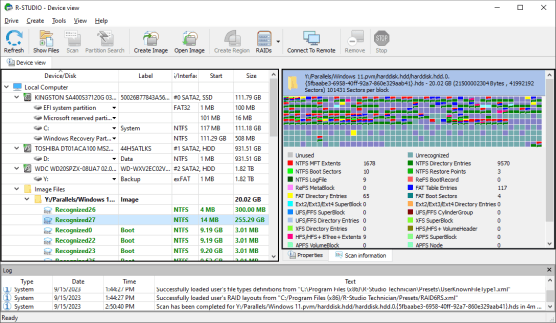
Click image to enlarge
Select a recognized partition and enumerate the files on it.
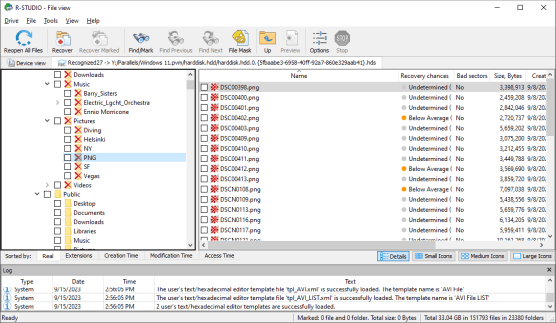
Click image to enlarge
Alternative methods that can be used in R-Studio versions that don't support virtual disk image formats.
Each method is tailored to a different type of R-Studio license: R-Studio Technician license, R-Studio Corporate license, and R-Studio Standalone license.
Method 1: Data Recovery from a Virtual Machine using R-Studio Technician License
This method works if you have an R-Studio Technician license, or if you are willing to use an activation code to register a copy of R-Studio Emergency.
1. Create or download the R-Studio Emergency ISO image. In this tutorial, we've saved the ISO as RSE.iso.
2. Set up your virtual machine to mount the R-Studio Emergency ISO to a virtual CD/DVD drive.
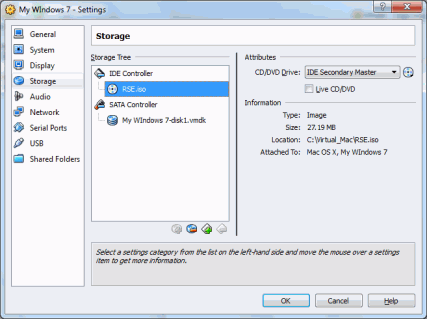
Click image to enlarge
3. Start the virtual machine with the CD/DVD drive as the startup device. You may need to change the boot order so that the CD/DVD drive boots first.
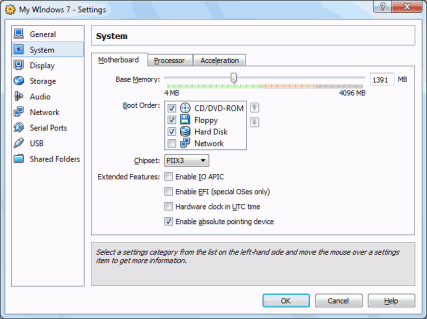
Click image to enlarge
4. The virtual machine will boot into R-Studio Emergency edition. Recover data from the virtual machine as described in the article
"Emergency File Recovery Using R-Studio Emergency".
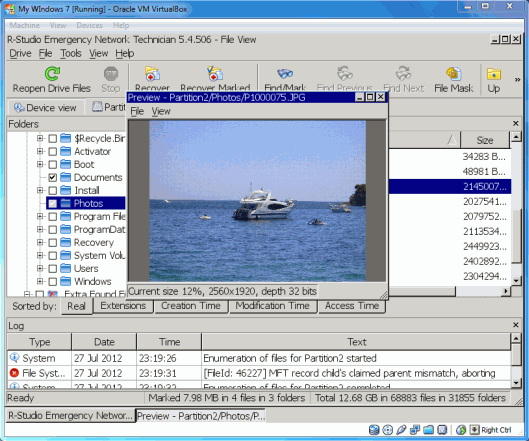
Click image to enlarge
Tip: You can use the network capabilities of R-Studio Emergency to store recovered files on the host machine. You can also connect a USB device and offload recovered files to an external mass storage device.
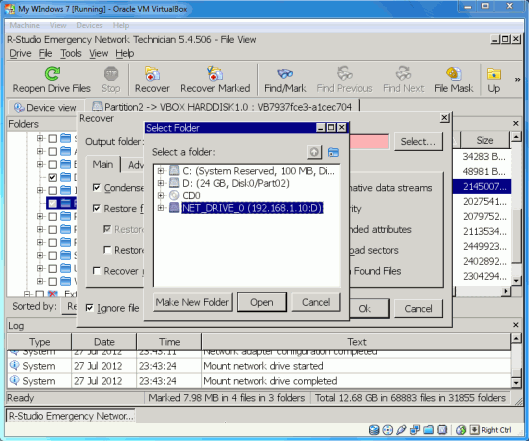
Click image to enlarge
Method 2: Data Recovery from a Virtual Machine using R-Studio Network License
If you have a network license of R-Studio, you can use the R-Studio Agent Emergency edition to perform an emergency data recovery over the network.
1. Create or download the R-Studio Agent Emergency ISO image. In this tutorial, we've saved the ISO as RSAE.iso.
2. Set up your virtual machine to mount the R-Studio Agent Emergency ISO to a virtual CD/DVD drive.
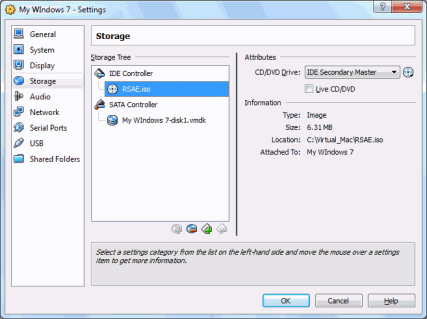
Click image to enlarge
3. Boot the virtual machine with the CD/DVD drive as the first startup device. You may need to change the boot order so that the CD/DVD drive boots first.
4. From the virtual machine, connect to the machine running R-Studio as described in R-Studio's help: Starting a Computer with the R-Studio Agent Emergency Startup Disk.
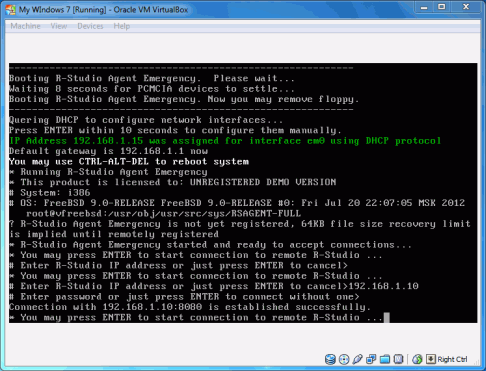
Click image to enlarge
5. Recover data from the virtual machine as described in the article "Emergency Data Recovery over Network".
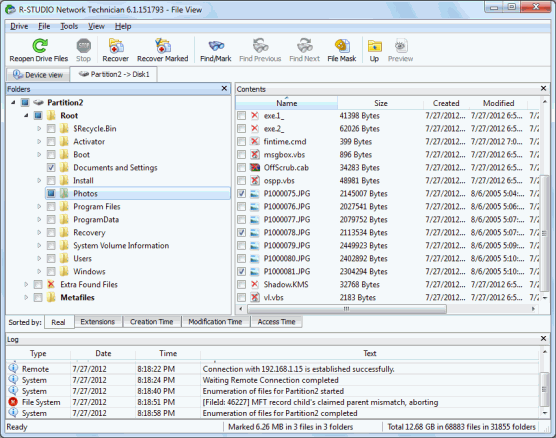
Click image to enlarge
Method 3: Data Recovery from a Virtual Machine using R-Studio Local License
If you have a standard local license of R-Studio, you can recover data from a virtual machine by creating an image of the drive, saving the image to another location and then recovering the data from the image.
1. Create or download the R-Studio Agent Emergency ISO image. In this tutorial, we've saved the image as RSAE.iso
2. Set up your virtual machine to mount the R-Studio Agent Emergency ISO to a virtual CD/DVD drive.
3. Boot the virtual machine with the CD/DVD drive as the startup device. You may need to change the boot order so that the CD/DVD drive boots first.
4. From the virtual machine, connect to the machine running R-Studio as described in R-Studio's help documentation: R-Studio Agent.
5. Using R-Studio, create an image of the virtual machine's drive. Save it to another location, such as a network drive or an external USB drive.
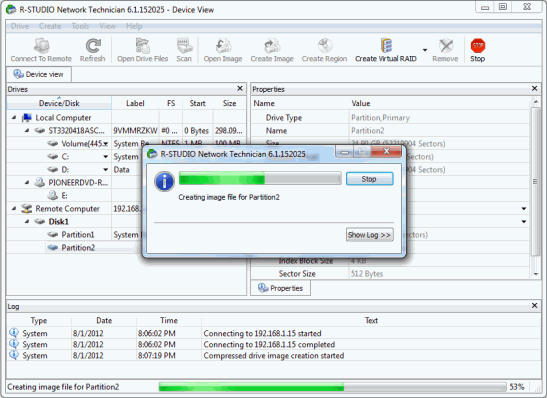
Click image to enlarge
6. In R-Studio, open the image and recover the data from it, as described in R-Studio's help documentation: Images.
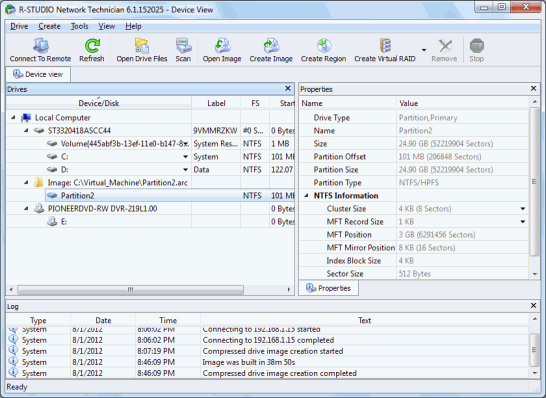
Click image to enlarge
As you can see, recovering data from a virtual machine can be achieved using R-Studio through several different methods. R-Studio's flexibility in working with local drives, networked machines and drive images allows you to utilize R-Studio's full range of data recovery features on virtual machines, just as you would on a physical machine. For additional tips and information, read Data recovery guide.
- R-Studio Technician: activation using a USB stick
- Data Recovery Guide
- Why R-Studio?
- R-Studio for Forensic and Data Recovery Business
- R-STUDIO Review on TopTenReviews
- File Recovery Specifics for SSD devices
- How to recover data from NVMe devices
- Predicting Success of Common Data Recovery Cases
- Recovery of Overwritten Data
- Emergency File Recovery Using R-Studio Emergency
- RAID Recovery Presentation
- R-Studio: Data recovery from a non-functional computer
- File Recovery from a Computer that Won't Boot
- Clone Disks Before File Recovery
- HD Video Recovery from SD cards
- File Recovery from an Unbootable Mac Computer
- The best way to recover files from a Mac system disk
- Data Recovery from an Encrypted Linux Disk after a System Crash
- Data Recovery from Apple Disk Images (.DMG files)
- File Recovery after Re-installing Windows
- R-Studio: Data Recovery over Network
- How To Use R-Studio Corporate Package
- Data Recovery from a Re-Formatted NTFS Disk
- Data Recovery from an ReFS disk
- Data Recovery from a Re-Formatted exFAT/FAT Disk
- Data Recovery from an Erased HFS Disk
- Data Recovery from an Erased APFS Disk
- Data Recovery from a Re-Formatted Ext2/3/4FS Disk
- Data Recovery from an XFS Disk
- Data Recovery from a Simple NAS
- How to connect virtual RAID and LVM/LDM volumes to the operating system
- Specifics of File Recovery After a Quick Format
- Data Recovery After Partition Manager Crash
- File Recovery vs. File Repair
- Data Recovery from Virtual Machines
- How to Recover Files from a Remote Computer Using R-Studio Standalone License and Its Network Capabilities in Demo Mode
- How to Connect Disks to a Computer
- Emergency Data Recovery over Network
- Data Recovery over the Internet
- Creating a Custom Known File Type for R-Studio
- Finding RAID parameters
- Recovering Partitions on a Damaged Disk
- NAT and Firewall Traversal for Remote Data Recovery
- Data Recovery from an External Disk with a Damaged File System
- File Recovery Basics
- Default Parameters of Software Stripe Sets (RAID 0) in Mac OS X
- Data Recovery from Virtual Hard Disk (VHD/VHDX) Files
- Data Recovery from Various File Container Formats and Encrypted Disks
- Automatic RAID Parameter Detection
- IntelligentScan Data Recovery Technology
- Multi-pass imaging in R-Studio
- Runtime Imaging in R-Studio
- Linear Imaging vs Runtime Imaging vs Multi-Pass Imaging
- USB Stabilizer Tech for unstable USB devices
- Joint work of R-Studio and PC-3000 UDMA hardware
- Joint work of R-Studio and HDDSuperClone
- R-Studio T80+ - A Professional Data Recovery and Forensic Solution for Small Business and Individuals Just for 1 USD/day
- Backup Articles
- R-Drive Image Standalone and Corporate license transferring
- Fixing Windows update error 0x80070643 with R-Drive Image
- Backup with Confidence
- R-Drive Image as a free powerful partition manager
- Computer Recovery and System Restore
- Disk Cloning and Mass System Deployment
- Accessing Individual Files or Folders on a Backed Up Disk Image
- R-Drive Image startup / bootable version
- File Backup for Personal Computers and Laptops of Home and Self-Employed Users
- Creating a Data Consistent, Space Efficient Data Backup Plan for a Small Business Server
- How to Move the Already Installed Windows from an Old HDD to a New SSD Device and Create a Hybrid Data Storage System
- How to Move an Installed Windows to a Larger Disk
- How to Move a BitLocker-Encrypted System Disk to a New Storage Device
- How to backup and restore disks on Linux and Mac computers using R-Drive Image
- R-Drive Image and Virtual Machines
- Undelete Articles
- Get Deleted Files Back
- Free Recovery from SD and Memory cards
- R-Undelete: Video Recovery
- Recovery from an External Device with a Damaged File System
- File recovery from a non-functional computer
- Free File Recovery from an Android Phone Memory Card
- Free Photo and Video File Recovery Tutorial
- Easy file recovery in three steps
Rating: 4.8 / 5
R-TT may not be the easiest or most user-friendly solution, but the algorithm used for the renaming saved me THOUSAND of hours of opening ...


